Easy as Apple Pie Hoop-Tuffet

This pincushion is seriously as easy-as-pie -- Apple Pie Hoop-Tuffet
Make a Hoop-Tuffet with an embroidery hoop and wool--each contributes elements of good design and function with very little sewing. Scroll to the end of the blog to read how to make a hoop tuffet as a basis for this quick & easy pincushion.

Use cinnamon-colored wool or wool felt and a 3" wood embroidery hoop to make the basic Hoop-Tuffet (see the end of this blog for complete instructions.)
Embellish the Basic Hoop-Tuffet
Cut 6 strips of tan felt 1/2" x 4 1/2". A scallop-edge is perfect for these strips. Remove the outer hoop and weave the strips over the pincushion. Trim the strips even with the bottom of the pincushion and use white glue to hold each end in place. Replace the outer hoop.


Cut one strip of tan felt 5/8" x 8 1/2", with one edge scalloped and the other straight. Hand gather slightly along the straight edge. Slightly stretch the scalloped edge, then adjust the gathers to create a circle that fits under the pincushion base. Apply glue around the inner edge of the circled strip and set the pincushion in place. Sew or glue the felt ends where they overlap.
Cut 4-5 small felt leaves (leaf patterns in P1087) from tan felt and arrange on the top. Sew or glue in place. Use the marker again to add ink highlights to the leaves and scalloped edge of the pie. Sew on an apple button and a sprinkle of tiny brown buttons. Add handmade Just Pins and you're finished!

More fun for pie lovers
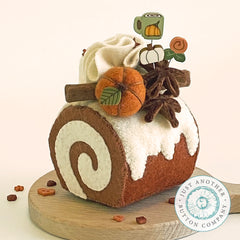
Pumpkin Spice Hoop-Tuffet is an easy adaption of the Just Desserts Pumpkin Spice Roll. This 2022 design was so much fun that we came up with two Fall desserts for 2023--Caramel Apple Pie and Perfect Pumpkin PIe. One pattern makes both pies. And now you can make an Apple Pie Hoop-Tuffet to complete the set! Click the images to find out more about the patterns.
Happy Fall Baking!

Complete Instructions for a Basic Hoop-Tuffet
Start with a 3" embroidery hoop--and choose a nice wood one with smooth, rounded edges.
Our favorite felted wool is from Weeks Dye Works. The wool is sturdy and beautifully hand-dyed. It stretches smoothly when stuffed with wool roving and is kind to needles and pins--perfect for pincushions.

Instructions for a Hoop-Tuffet
Cut a square of felted wool 2” larger than the diameter of the hoop--a 5” square for a 3” circle hoop. Cut a second square one inch less for covering the back—4” square. Wool felt will also work for a hoop-tuffet, but the pincushion will be a bit more flat.
Base: Loosen the screw and remove the inner section of the hoop. Trace around the outer edge of the inner hoop on lightweight cardboard. Trace a second circle, cut out both and glue together. Trim the corners of the smaller wool square to make a rough circle, then hand sew a long running stitch (1/4" stitches) along the outer edge, leaving the thread attached for gathering. Center the cardboard sandwich on the wool circle and pull the stitches to gather tightly. Secure and knot the thread. This is the tuffet base—set aside for now.

Tuffet Top: Lay the inner wood hoop on a flat surface and center the larger wool square over top. Loosen the screw on the outer hoop and press down over the wool and inner hoop. Tighten the screw, but don’t tug the wool—it should be smooth, but not taut.
Flip the hoop to the back and trim the corners of the wool to leave a circle (don’t trim more than necessary to create the shape. Hand sew a long gathering stitch at the outer edge. Pull to gather then secure and knot the thread.
Pull off bits of roving and fill the inside edges of the hoop between the wool front and back. Continue to stuff, first the edges then the center, to raise the tuffet shape on top. The felted wool will stretch as you work, and adding the wool roving in bits prevents lumps.

Finishing: When you can press the hoop down on a surface and see a nice dome shape, remove the outer hoop and sew the base to the back. Replace the outer hoop and tighten the screw. The base is intentionally sturdy to push the roving up into the tuffet. It also holds the hoop up off a table surface just a bit which offers plenty of embellishment opportunities. You can add a row of trim below the outer hoop or push the outer hoop down a little and add trim around the little shelf of the inner hoop.
Finish with a set of Just Pins, or add even more fun details to the top! This hoop-tuffet is finished with design elements from the Pumpkin Spice Roll Pincushion Pattern.


